
NG Tube Insertion: The Safe Way! | Step-by-Step Guide (3D Animation)
NG Tube Insertion: A Complete Clinical Guide Nasogastric (NG) tube insertion is a standard clinical procedure used to access the stomach for diagnostic and therap...
Medically Reviewed By
Medscope Editorial Team Verified
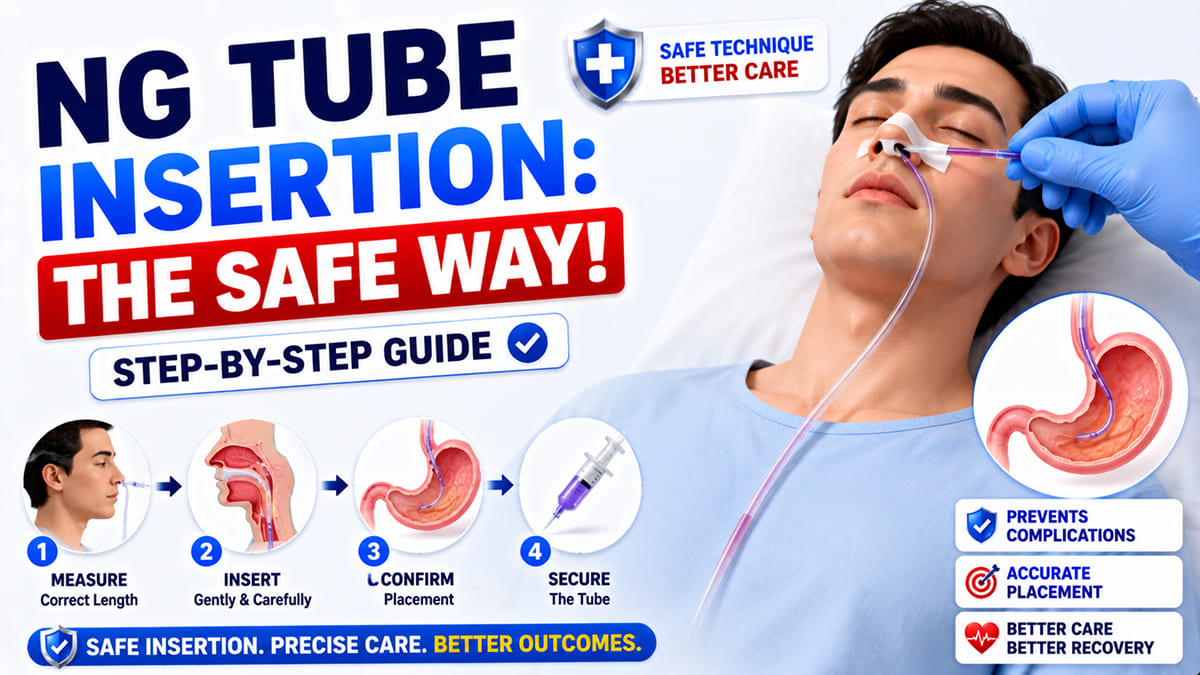
NG Tube Insertion: A Complete Clinical Guide
Nasogastric (NG) tube insertion is a standard clinical procedure used to access the stomach for diagnostic and therapeutic purposes. It is commonly used for administering enteral feeding, delivering medications, or performing gastric decompression (removing stomach contents). Because the tube passes through the nasal cavity, down the pharynx, and into the stomach, proper technique is essential to prevent severe complications like placing the tube into the lungs.
Step 1: The NEX Measurement Technique
Before inserting the NG tube, you must measure the correct length to ensure the tip reaches the stomach and doesn't stop in the esophagus. Healthcare providers use the standard NEX measurement method:
- N - Nose: Start the measurement from the tip of the patient's nose.
- E - Ear: Extend the tube to the tip of the patient's earlobe.
- X - Xiphoid Process: Finally, extend the tube down to the xiphoid process (the lower tip of the sternum/breastbone).
Mark this final measurement on the tube with a piece of tape or a permanent marker. This is how deep the tube needs to go.
Step 2: Patient Preparation and Positioning
Proper patient positioning makes the procedure easier and safer. Place the patient in a High-Fowler's position (sitting straight up at a 90-degree angle). Provide them with a cup of water with a straw (if they are allowed to drink), and drape a towel over their chest. Lubricate the first 2 to 4 inches of the NG tube with a water-soluble lubricant.
Step 3: The Insertion Process (Step-by-Step)
- Initial Insertion: Ask the patient to keep their head slightly tilted backward. Gently insert the lubricated tube into the clearest nostril, aiming downward and backward along the nasal floor.
- Passing the Nasopharynx: When the tube reaches the back of the throat (nasopharynx), the patient may gag. Pause briefly and let the patient rest.
- The Chin-to-Chest Position: Ask the patient to tilt their head forward, bringing their chin to their chest. This anatomical position closes the airway (trachea) and opens the esophagus, making it much harder for the tube to accidentally enter the lungs.
- Swallow and Advance: Ask the patient to take small sips of water and swallow. Advance the tube 1 to 2 inches with each swallow until you reach your taped measurement mark.
Step 4: Confirming Correct Placement
Never administer food or medication immediately after insertion. You must verify that the tube is actually in the stomach and not in the respiratory tract. The standard verification methods include:
- Chest X-Ray: This is the gold standard and the most accurate way to confirm correct NG tube placement before initial use.
- pH Testing: Aspirate a small amount of gastric fluid using a syringe and test it with pH paper. Stomach acid typically has a pH of 1 to 5, whereas respiratory fluid has a higher pH (usually 6 or greater).
Clinical Safety Reminder
If the patient starts coughing uncontrollably, turning blue (cyanosis), or gasping for air during insertion, immediately withdraw the tube. This is a clear clinical sign that the tube has entered the trachea instead of the esophagus.